One common IoT project requirement is the need to detect something in an image. For example, a security system might need to detect potential intruders, a wildlife monitoring system might need to detect animals, or a facial recognition system might need to detect, well, faces.
The issue is detecting things in images, or image classification, has historically been an advanced task, requiring a deep understanding of how both machine learning and a variety of mathematical processes work.
The good news is the over the last few years a series of tools has made the image classification process far more approachable for the average developer.
In this article you’ll learn how to build your first image classifier with Edge Impulse, and how to deploy that image classifier to a Raspberry Pi. If you follow along to the end you’ll see how I built the image classifier below.
Ok so @EdgeImpulse is pretty darn impressive for ML stuff. After taking some time to learn the basics, I was able to build this model with my kids in like an hour. pic.twitter.com/P78jE0MIna
— TJ VanToll (@tjvantoll) November 5, 2021
Let’s get started by looking at Edge Impulse.
Getting started with Edge Impulse
Edge Impulse is a platform that simplifies a number of different machine learning processes. To get started, go ahead and create a new free account, after which you’ll see the screen below to select a project type. For now go ahead and select Images.
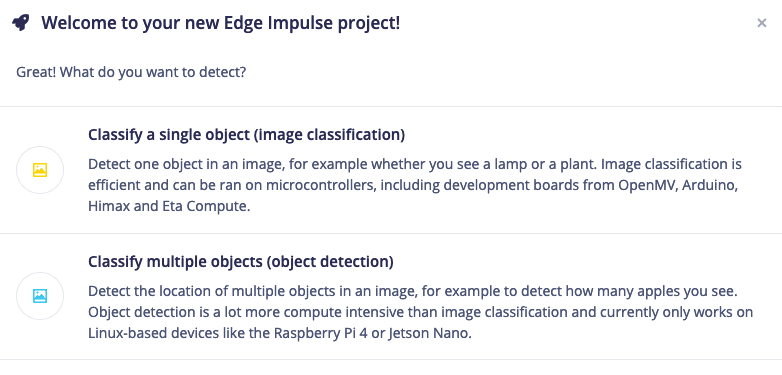
After selecting Images, you’ll be asked whether you want to classify a single object or multiple. Looking for a single object in an image is simpler, and therefore less processor intensive. But looking for multiple objects is more powerful, and fun to use while learning because you can detect multiple objects in one frame. So for now go ahead and pick Classify multiple objects.
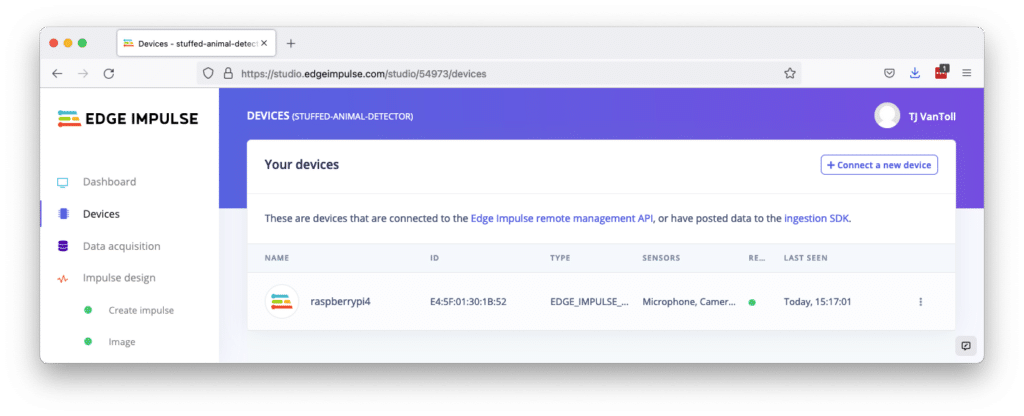
From there you’ll need to connect Edge Impulse to a development board, which is the device you’ll eventually want to run your project on. Edge Impulse supports a wide variety of boards, and their documentation on how to connect to a board is quite good and comprehensive, so I won’t replicate it here.
But if you want to follow along with my exact steps, I used their Raspberry Pi instructions to connect to my Raspberry Pi 4. Regardless of what device you use, when you complete the connection instructions you should see your device listed in on Edge Impulse’s device tab.
And with that setup out of the way, it’s time to capture images.
Capturing data
Computers don’t natively know what a cat, a tree, or a fork is. The only way to teach computers about object is to give them a bunch of labeled images as input, so that the computer can learn to recognize those objects in new images.
In practice, this means you need to take a lot of pictures of whatever objects you want to recognize, and then label those pictures so a machine learning algorithm can start to recognize patterns.
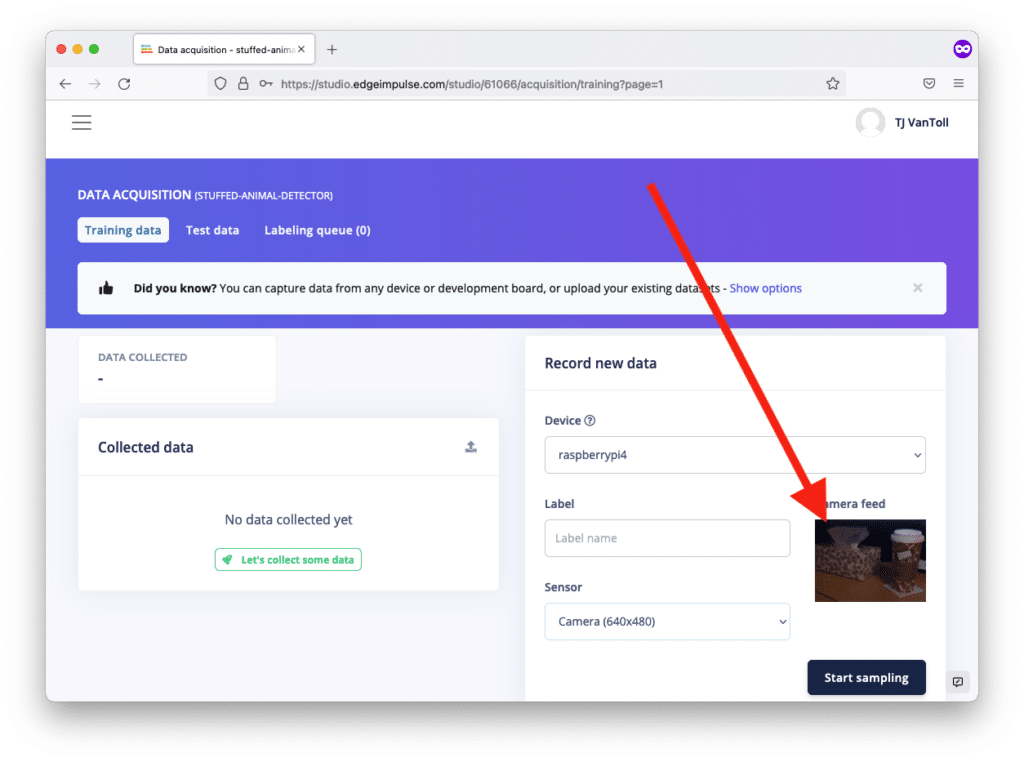
Luckily, this is one process that Edge Impulse greatly simplifies for you. To try it out, go ahead and go to the Data acquisition tab in Edge Impulse’s dashboard, and note the Record new data box on the right. If you connect a board to Edge Impulse, and you hook a camera up to your board, you can see a raw camera feed directly within that box in the Edge Impulse UI.
The instructions on getting this feed to work will vary depending on which board you use, but for my Pi I had to connect a Pi Camera, and runn the edge-impuse-linux command on my device.
Once you have your device connected your next step is to take a lot of pictures of the objects you want to detect. I’d recommend starting by taking 30–50 pictures of each object, one at a time, while trying to vary the camera angle, zoom, and position of your object in between pictures. For a Label you can use the name of the object for now.
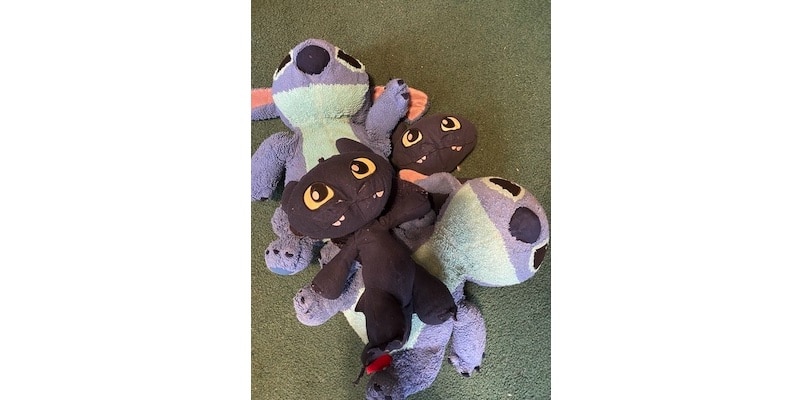
If you’re not sure which objects to start with, I’d recommend picking two distinct-looking things from around your house, which in my case—at the request of my kids—ended up being these stuffed Toothless and Stitch animals.
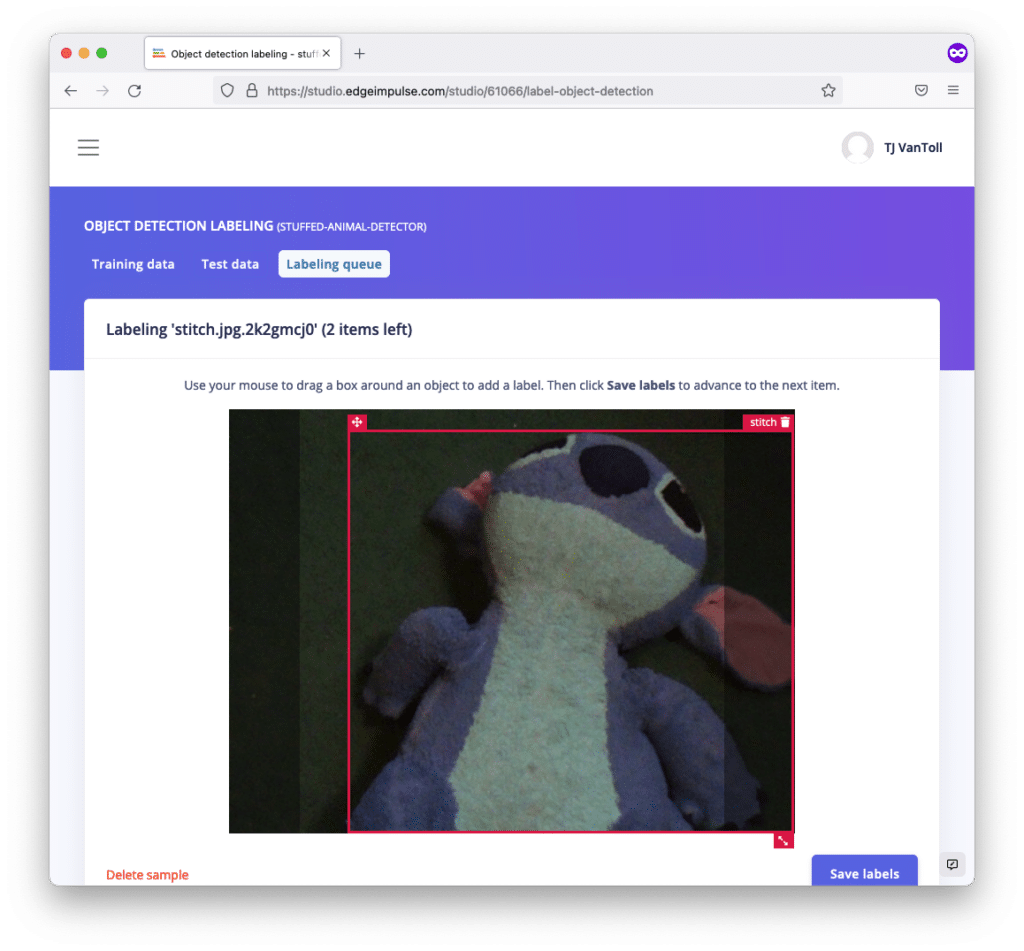
Once you have a good batch of images, click the Labeling queue button at the top of the Edge Impulse UI. Labeling images involves drawing a box around the objects you want to identify in each of your pictures. This will take a while, but it’s important, as this data is how the machine learning algorithm will learn what your object is. And the good news is Edge Impulse learns as you go, and will start automatically drawing boxes around your objects to save you time.
When you finish labeling all your images, you now have a data set to use for your first image classification algorithm.
Creating your first classification algorithm
Machine learning algorithms have the potential to be powerful, but also quite complicated. Luckily, Edge Impulse again simplifies the process considerably by providing a number of intelligent defaults.
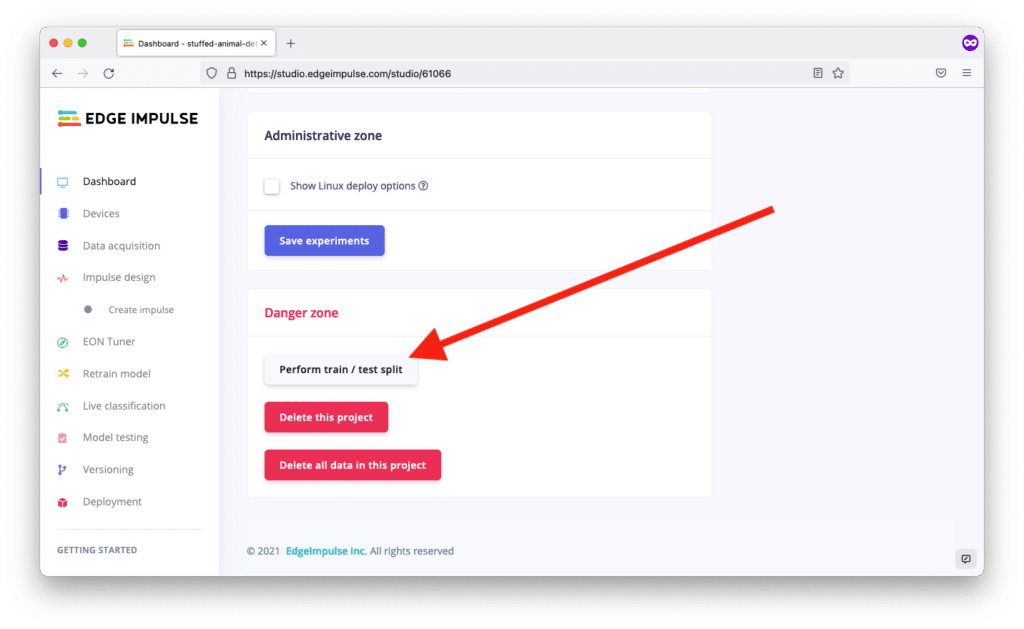
For example, a first step for many machine learning processes is to create a train-test split. Essentially, you spilt your data set into two buckets: a train set used to train the algorithm, and a test set used to ensure the algorithm is working like it should.
To do this split in Edge Impulse return to your dashboard, scroll down, and click the Perform train / test split button. This automatically splits your labeled images into train and test categories, and gets you ready to create the algorithm itself.
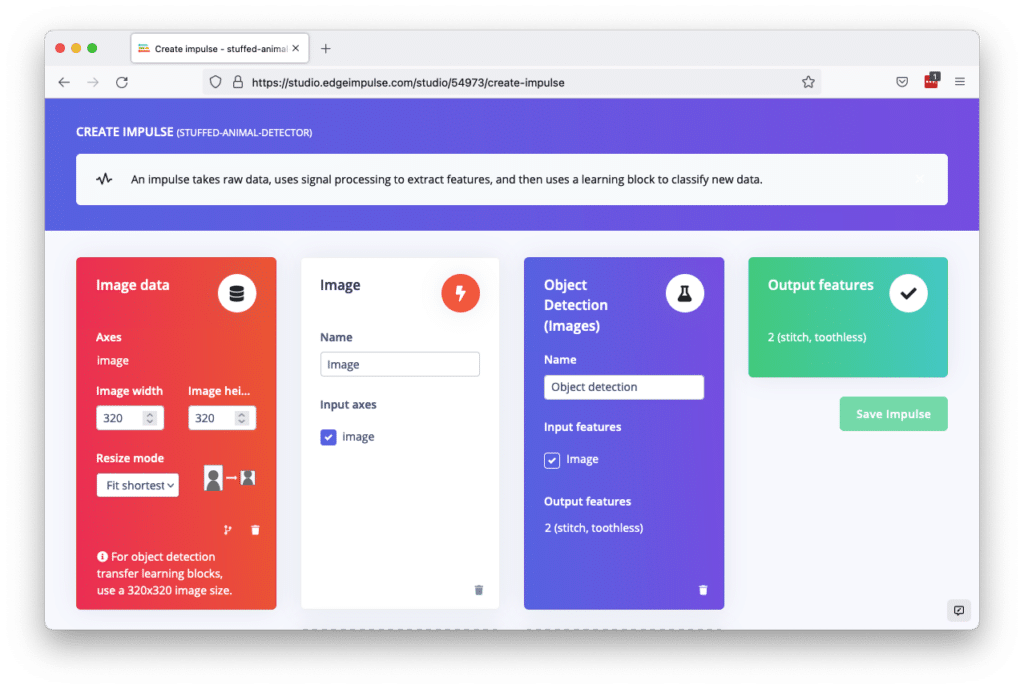
With your data split, your next step is to go to the Impulse design screen in Edge Impulse. Edge Impulse uses the term “impulse” to refer a process that takes data, does some logic to find patterns in that data, and then uses those recognized patterns to classify new input.
There’s a lot you can do to customize the process of building an impulse, but when getting started it’s a good idea to just use the platform’s defaults. To do that, go ahead and set your Image data to a height and width of 320, use the basic Image processing block, and use the default Object Detection (Images) learning block. You can see what this looks like below.
When you’re done, go ahead and save the impulse, and then head to the Impulse design –> Image screen in the Edge Impulse UI. On this page you can configure what Edge Impulse calls a processing block, which is essentially a way of looking at data (in this case images), and looking for patterns, or features. It’s a little easier to understand how this works when you see the results, so go ahead and click Save parameters and then Generate features. When the process finishes, you should see a graph that looks a little like this.
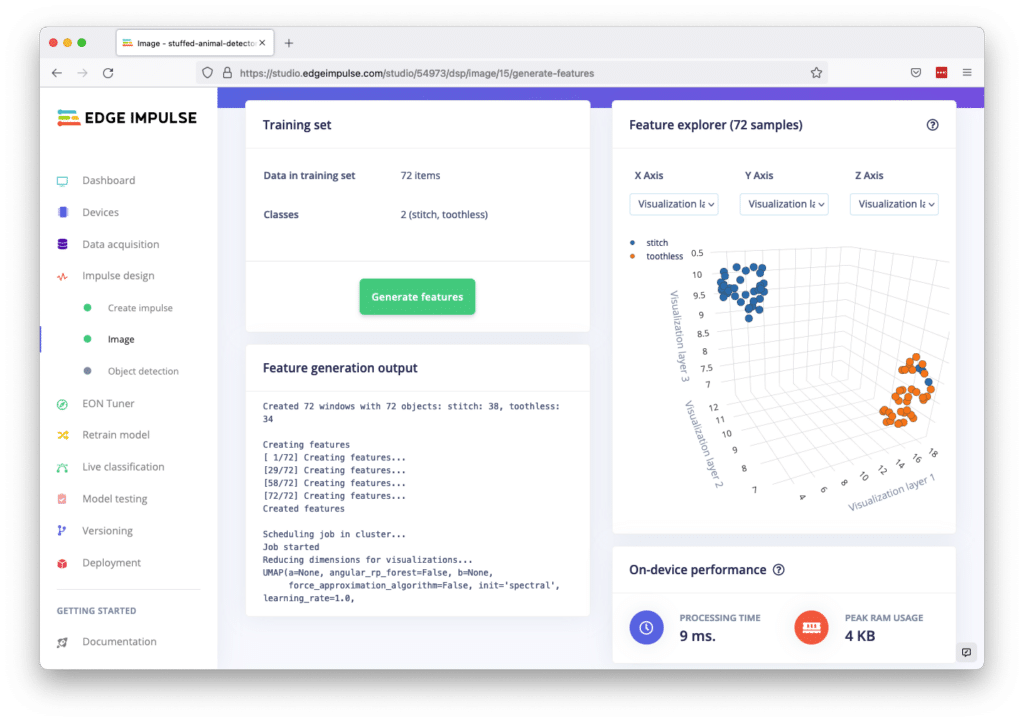
If all went well you’ll see a clear separation of dots in your chart, which indicates that Edge Impulse was able to differentiate between the two objects you gave as input. You can click on individual dots to see what images were outliers, as that can help give you an idea of where the algorithm might be struggling to classify your objects.
Next, head to Edge Impulse’s Impulse design –> Object detection screen, which is where you configure what Edge Impulse calls learning blocks. Learning blocks are ways for your algorithm to detect objects in new image data, based on what it learned from processing your dataset. Once again there’s a lot you can configure here, but when just getting started you can just hit the Start training button to see how it all works.
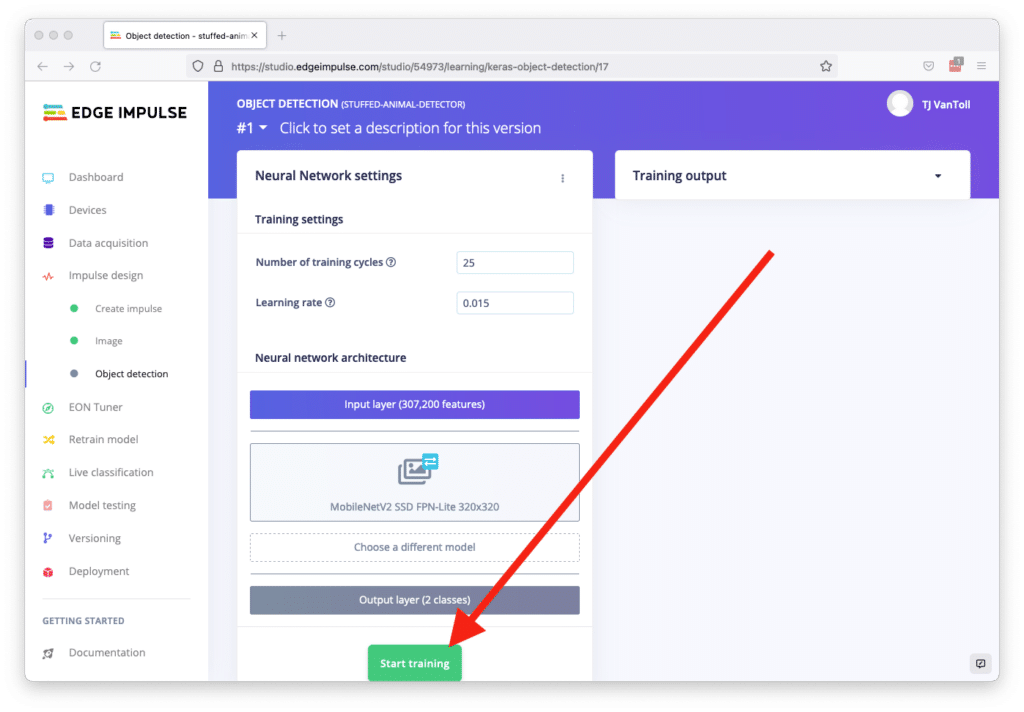
This process builds a machine learning model based on your dataset, which takes a while because it’s doing a lot of math on your behalf. (Thanks Edge Impulse!) When it’s done, you now have a machine learning model you’re ready to test.
Trying your new machine learning model
Remember how you split your images into two groups, one for training and one for testing? Edge Impulse used your training images while building your model, and it set aside the rest of the images for testing. It’s now time to use those testing images, and you can do so by going to Edge Impulse’s Model Testing screen.
Here, go ahead and click the Classify all button, which classifies all of your testing images using your new machine learning model.

When the process finishes, you’ll see how accurately your model was able to categorize your testing images. Anything over 80% is good, and low scores are an indication you need to provide more training images to help your model better classify your objects.
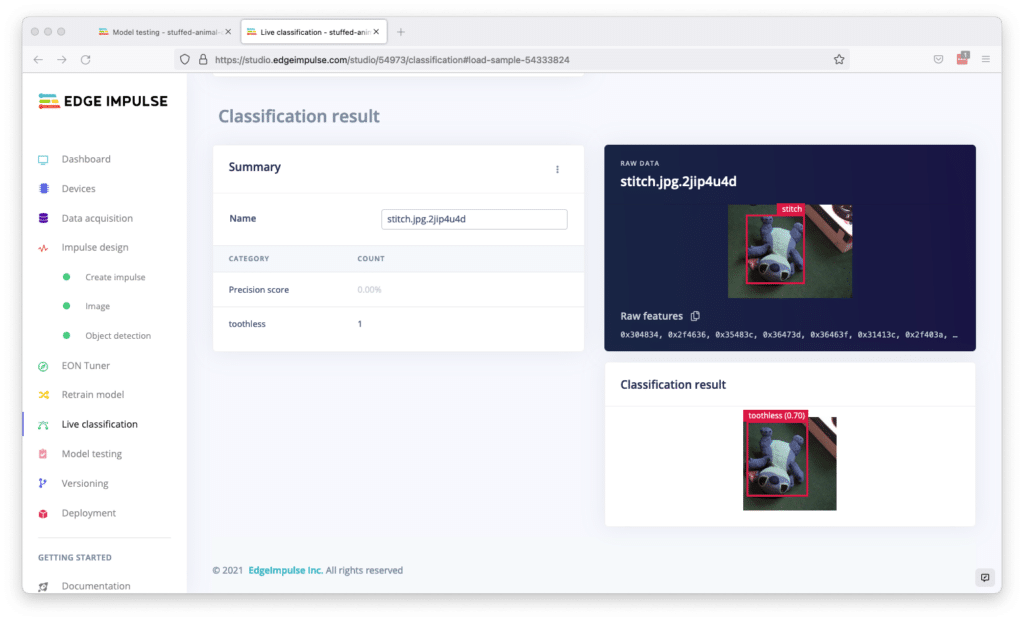
You can click the View classification link (in the triple-dot menu) on each image to see where things went wrong, which can give you an idea of types of images you might want to add to your training dataset.
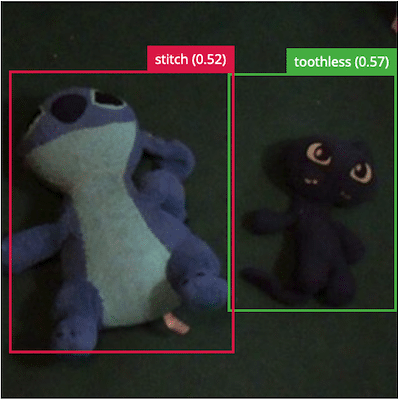
In my case, my model seemed to struggle on images where my stuffed animals sat at odd angles. For example, see below where the model thought an upside down Stitch was actually a Toothless. So if I want to improve my model, I likely need to provide more labeled images with my stuffed animals at a variety of angles.
Test images are a great way to see the weaknesses of your model, and to help you iterate to create a model that you can trust in a production setting.
But test images aren’t the only tool that Edge Impulse provides to test your images. One interesting (and fun) way to try out your model is to deploy it to your development board. The instructions to do this in Edge Impulse will again vary by the development board you use (so make sure to check with the Edge Impulse board documentation), but for my Raspberry Pi deployment is as simple as running the following command.
edge-impulse-linux-runner
This command automatically downloads the latest machine learning model you built, deploys it to your development board, and starts running it. When everything ready you’ll see a message like this in your board’s terminal.
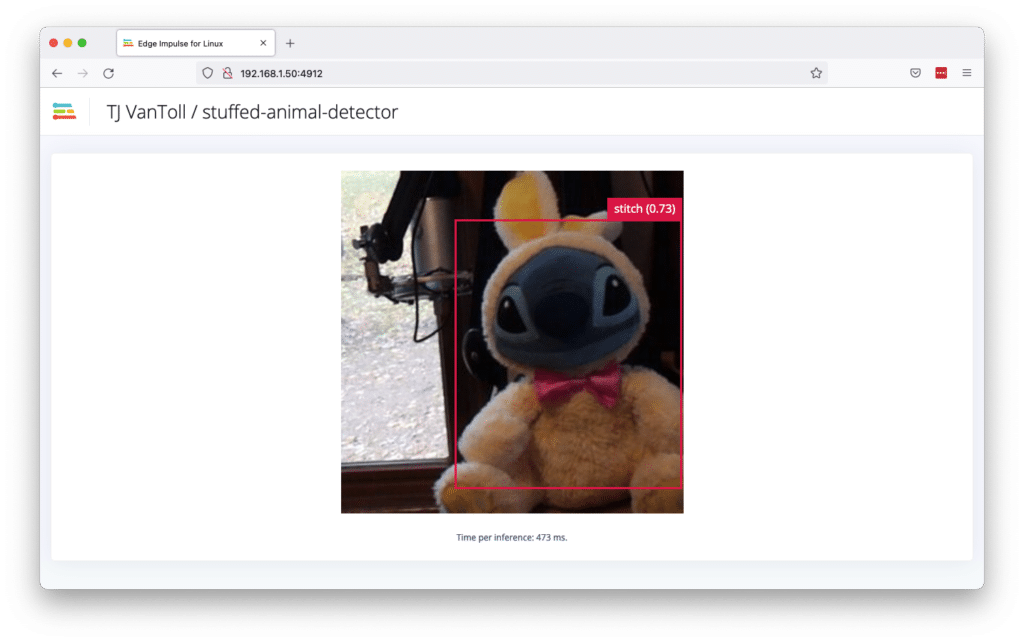
Want to see a feed of the camera and live classification in your browser?
Go to http://192.168.1.50:4912
If you open that URL in a web browser, you’ll see a camera feed from your board that’s doing object classification—100% live. How cool is that?
The live classification process is fun and also useful, as you can use the camera feed to determine where your model is struggling, and use that information to take more pictures to build a more robust dataset.
And ultimately, building a robust image classification model is about repetition: keep building a larger data set, and keep customizing your process until you have an algorithm that finds objects well enough your project. (If you’re struggling to improve your model’s performance, check out Edge Impulse’s tips on the topic.)
And when you’re satisfied with your model, head to the Deployment section of the Edge Impulse UI, which will help you get your model into code that you can deploy to your production hardware. And if you’re not sure what hardware to use, check out the Blues Wireless Swan, as its 120 MHz clock speed, 2MB of Flash and 640KB of RAM make it a great board for on-device ML processing.
Wrapping up
Image classification is a common need in IoT apps that has been traditionally hard, but has gotten easier thanks to tools like Edge Impulse.
In this article you learned how to use Edge Impulse to build a dataset of images, how to build a machine learning model that classifies objects in those images, and how to deploy that model to a device and test it live.
Working with image classification is fun, so hopefully you can use this newfound knowledge to build something cool 🙂
Additional reading
Busted! Create an ML-Powered Speed Trap
Using Swan with Edge Impulse